Streaming enthusiasts, rejoice! Setting up IPTV on your Windows PC has never been easier. With My IPTV Player, you’re just a few steps away from a world of endless entertainment. Follow our guide below to get started:
Step 1: Download & Install
Begin by downloading the My IPTV Player software. If you haven’t already, grab it from the official Microsoft Store. Once downloaded, proceed with the installation.
Step 2: Launch & Navigate
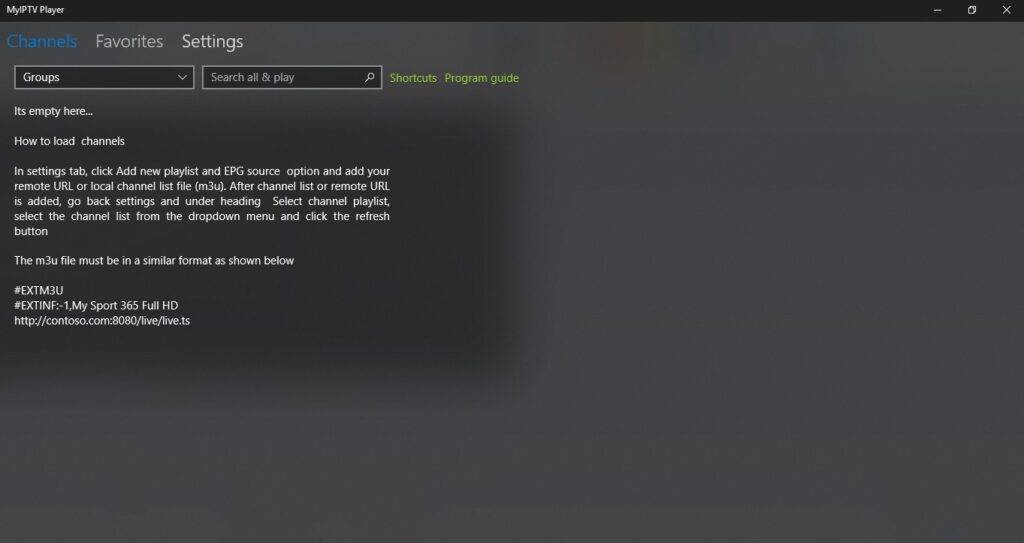
Upon launching the app, you’ll be presented with the main interface. Familiarize yourself with the layout.

Step 3: Access Settings
Locate and click on the “settings” option at the top of the screen.
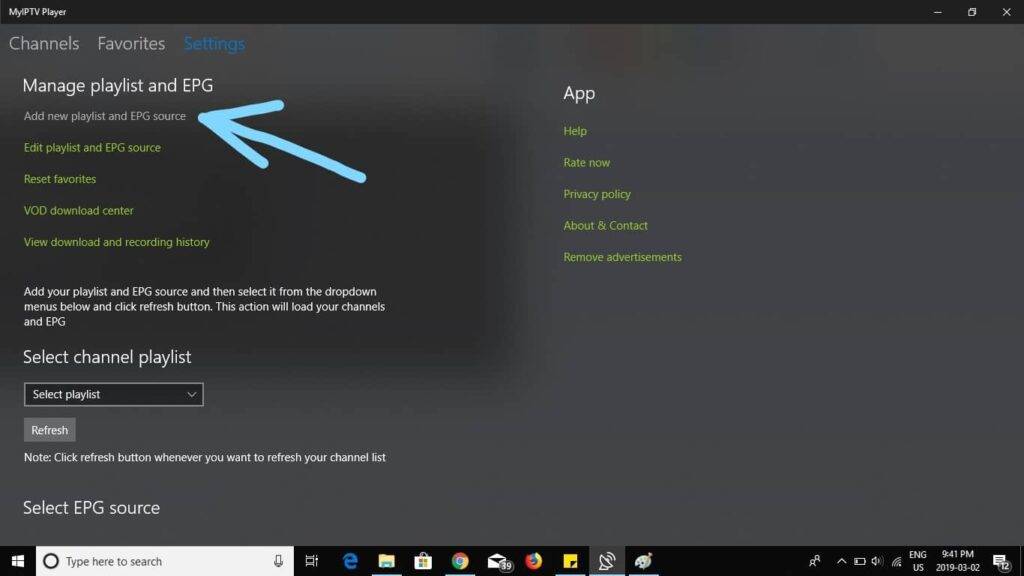
Step 4: Add Playlist & EPG Source
Choose “Add new playlist and EPG source”. This is where you’ll input your IPTV details.
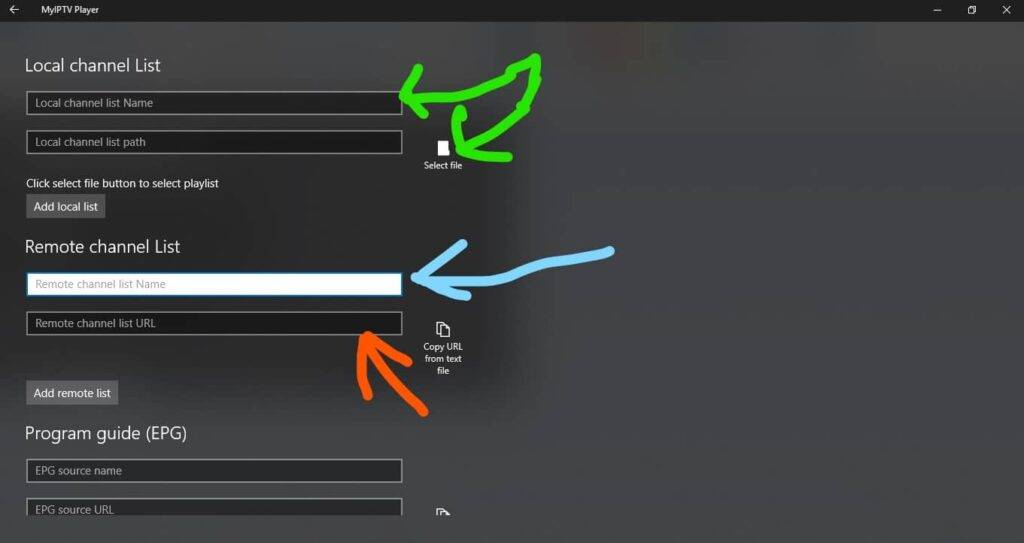
Step 5: Input Playlist Details
Provide a name for your playlist (indicated by the blue arrow). Then, enter the M3U playlist URL provided by your IPTV service (highlighted by the orange arrow). If you’ve downloaded the playlist to your PC, you can select it (as indicated by the green arrow).

Step 6: EPG Configuration
Scroll to the program guide section. Here, provide a unique name for the EPG source. Next, input the EPG source URL provided by your IPTV service.
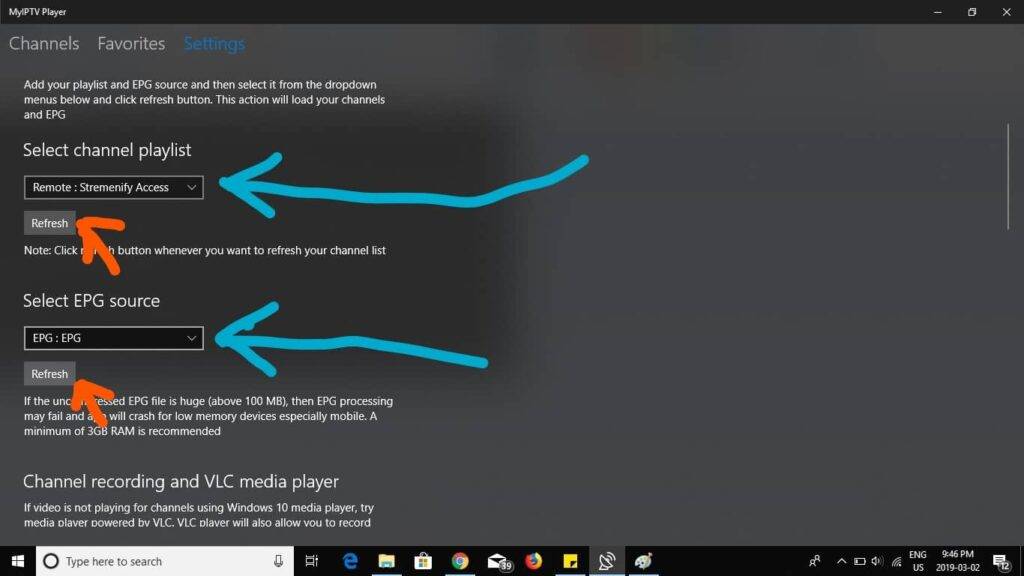
Step 7: Finalize Setup
Return to the main screen by clicking the arrow at the top left. From the dropdown menu (blue arrow), select the channel playlist you created. Similarly, choose the EPG source you set up. Refresh both the channel playlist and EPG source using the refresh buttons (orange arrows).
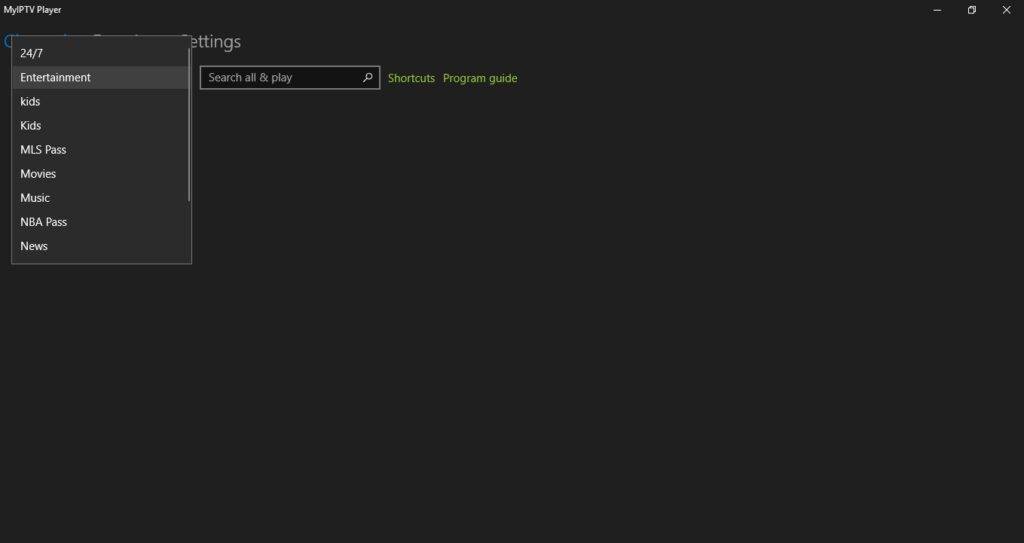
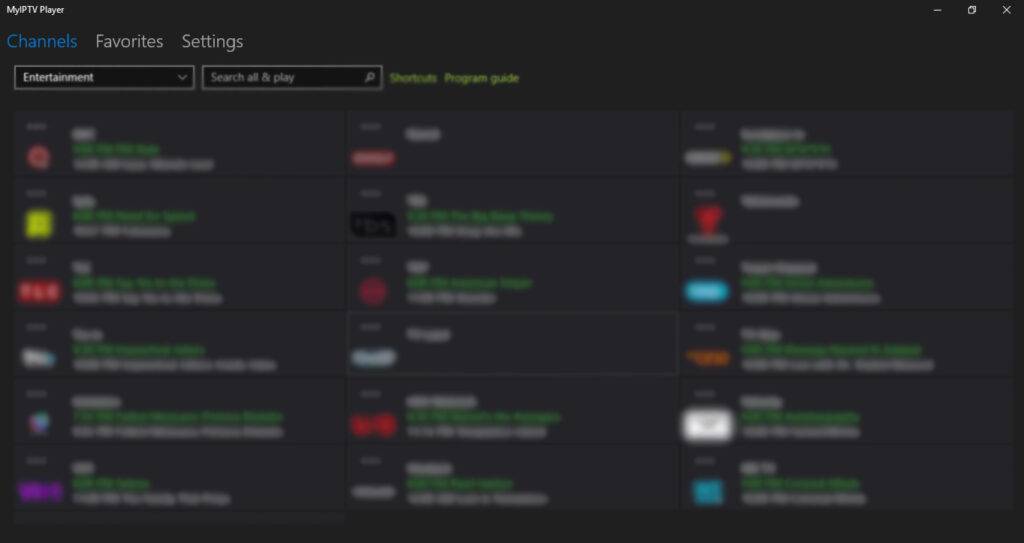
Step 8: Dive into Channels
Click on “channels” at the top left. From the dropdown under channels, pick your desired category. Your channels should load, and you’re all set to start watching!
Step 9: Access Program Guide
For a detailed view of upcoming shows, click on the “program guide”. This will display the Electronic Program Guide (EPG) for your channels.
